Create access policies
You can create a new access policy from scratch by using the Create Policy option or use an available Genesys Cloud designed prebuilt policy template, edit it, and save it as a policy.
Note: You can have only one policy with the same target and subject combination. If you must create more conditions for the same target-subject combination, add them to the existing policy.
Create an access policy from a prebuilt template
To create an access policy from an existing policy template, do the following:
- Click Menu > User Management > Access Policies.
- Click Templates.
- Select an existing template. Genesys Cloud provides the following access policy templates for you to get started:
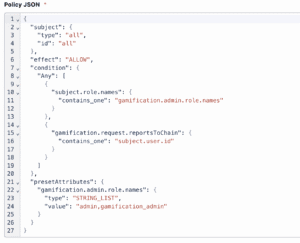
- Access Control for Gamification Scorecard and Insights
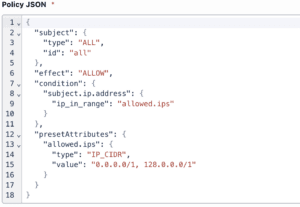
- Allow Access from Certain IP Addresses
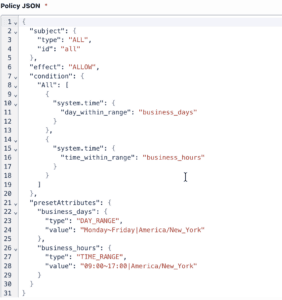
- Allow Only During a Time Frame
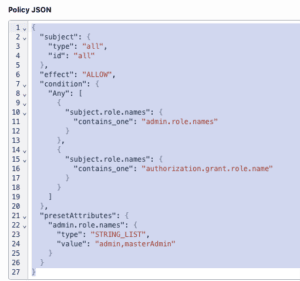
- Cannot Grant New Roles
- Cannot Update Certain User Profile Fields
- Click the policy template based on your requirement. The template details appear.
- Edit the policy name and description.
- Select the Policy type. You can select one of the following policy types.
- Global Policy – if you want to apply the policy conditions on all API requests, select the policy as a global one.
- Targeted policy – if you want to apply the policy conditions only on a specific domain, entity, and action, select the policy as a targeted one.
- For targeted policies, select the target Domain, Entity, and Action fields.
- (Optional) Allow the policy to be enabled immediately by toggling the Enable Policy option. You can also enable a policy later by editing the policy. For more information, see Enable Access Policy.
- Modify the subject, effect, condition, and preset attributes sections in the Policy JSON, if necessary, to meet your organizational needs.Note:
- For more information about fields used in Policy JSON, see the Definitions used in the ABAC section.
- For more information about supported user profile fields for the Cannot Update Certain User Profile Fields template, see the List of supported user profile fields article.
- For a detailed information about access policy attributes, see Attribute-based access control.
- To validate the JSON syntax, click Validate Syntax in the Validate Syntax tab. Resolve any syntactical errors, and proceed with saving the policy. In case you don’t validate syntax explicitly, Genesys Cloud automatically validates syntax when you save the policy. The syntax validation step validates the following:
- Whether the mandatory fields are available.
- The listed attributes are valid for the specified target.
- All attribute comparisons are valid for their respective data types.
- Any preset attribute names don’t conflict with the ones defined in the system.
- Click Save as Policy.
- To verify if the policy works as expected, click the Test Policy tab and provide sample data and click Test Policy.
- To go back to the policies page, click Cancel.
Sample prebuilt templates
Genesys Cloud includes the following access policy templates:
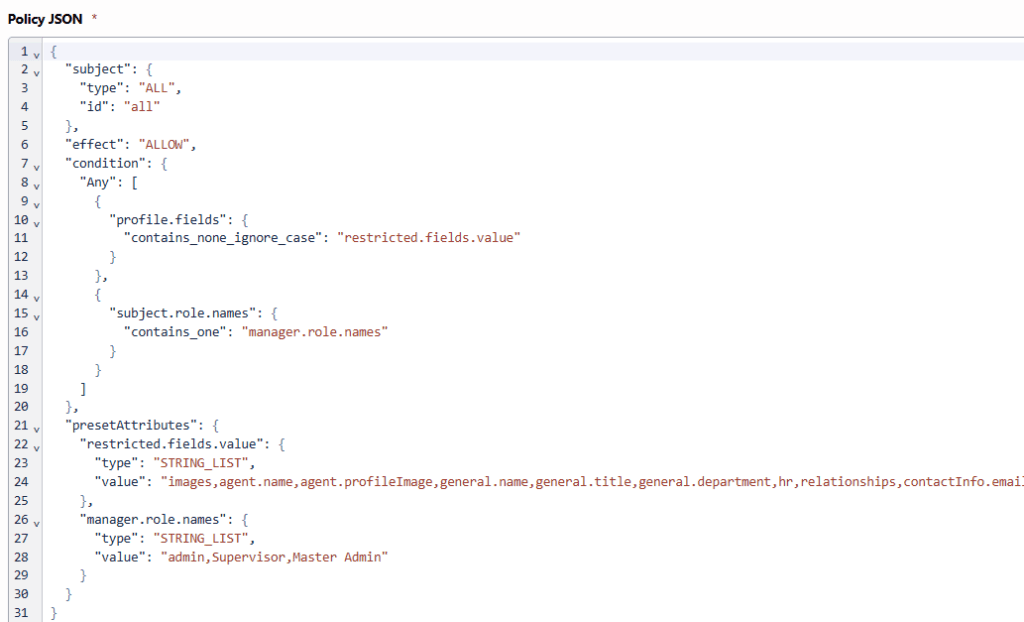
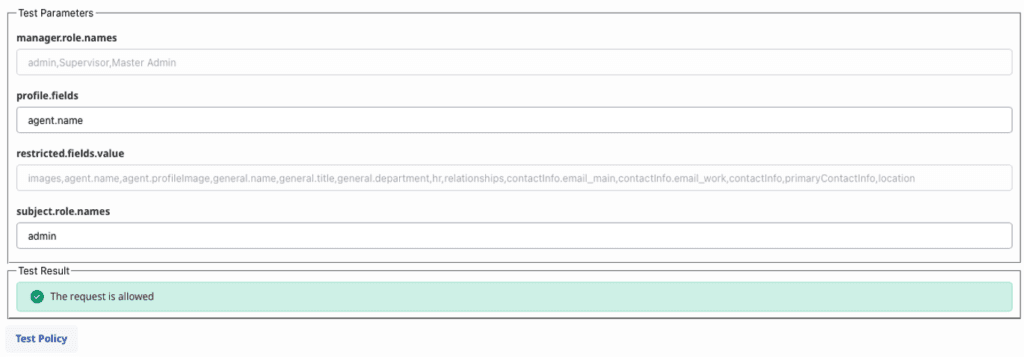
Create an access policy using the Create Policy feature
To create an access policy from scratch, do the following:
- Click Menu > User Management > Access Policies.
- Click Create Policy.
- Enter the policy name and description.
- Select the Policy type. You can select one of the following policy types.
- Global Policy – if you want to apply the policy conditions on all API requests, select the policy as a global one.
- Targeted policy – if you want to apply the policy conditions only on specific domain, entity, and action, select the policy as a targeted one.
- Specify the domain, entity, and action fields based on your policy requirements. You can refer to the prebuilt templates for creating your own policy.
- (Optional) Allow the policy to be enabled immediately by toggling the Enable Policy option. You can enable a policy later by editing the policy. For more information, see Enable Access Policy.
- Define the subject, effect, and condition sections in the Policy JSON based on your organizational needs. Note:
- For more information about fields used in Policy JSON, see the Definitions used in ABAC section.
- For more information about the preset attributes list used in Policy JSON, see Restricted fields value list.
- For a detailed information about access policy attributes, see Attribute-based access control.
- To validate the JSON syntax, click Validate Syntax in the Validate Syntax tab. Resolve any syntactical errors, and proceed with saving the policy. In case you don’t validate syntax explicitly, Genesys Cloud automatically validates syntax when you save the policy. The syntax validation step validates the following:
- Whether the mandatory fields are available.
- The listed attributes are valid for the specified target.
- All attribute comparisons are valid for their respective data types.
- Any preset attribute names don’t conflict with ones defined in the system.
- Click Save.
- To verify if the policy works as expected, click the Test Policy tab and provide sample data and click Test Policy.
- To go back to the policies page, click Cancel.
[NEXT] Was this article helpful?
Get user feedback about articles.