Configure the Genesys Cloud CX Utility label
Note: This article applies to CX Cloud from Genesys and Salesforce integration.
When you add the Genesys Cloud CX Utility to the Contact Center Lightning app, you can configure what appears in its label. The label appears in the utility title bar. When the utility window is minimized, the bar shows the label so that agents can view their status without opening the utility. The utility title bar also shows the current presence status icon.
To configure the label:
- On the Setup Home page, search for Apps in the Quick Find box and select App Manager.
- Select the Contact Center Lightning app for CX Cloud and click Edit.
- Under Utility Items (Desktop only), select the Genesys Cloud CX Utility item already added to the app.Note: The first part of the label is the text you enter in the Label field under Utility Item Properties. It doesn’t always read Genesys Cloud CX Utility. If your organization customized the label, your text appears instead.
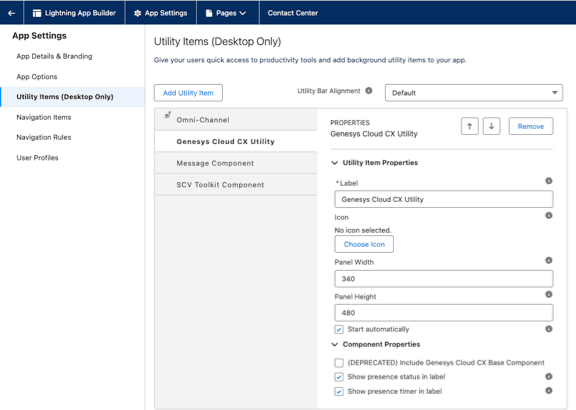
- Select the options under Component Properties:
- Show presence status in label – Appends the agent’s current Genesys Cloud presence status to the label. For example, Available or On Queue.
- Show presence timer in label – Appends a timer showing how long the agent has been in the current presence status. The timer in the label uses a compact format and shows only the units that apply:
- Click Save.
Note: The presence status and timer update automatically. If you select both options, the label appears as Genesys Cloud CX Utility – <Presence status > <time. For example, Genesys Cloud CX Utility – Available 20m.
For more information, see View agent status in Genesys Cloud CX Utility.
[NEXT] Was this article helpful?
Get user feedback about articles.